Nest Hello Review and Installation
/
Nest Hello Review & Installation Guide. We Teach you about the Nest Hello and How To Install the Nest Hello
The Nest Hello is Google's first smart doorbell with live video in the nest lineup. Prior to the launch of the Nest Hello the Ring doorbell was the dominant player in the smart doorbell space.
The Nest Hello can be installed on most homes that have existing doorbell wiring with minimal modification but if you aren't comfortable with electrical wiring you should hire a recommended a smart home pro.
I personally have a Nest Hello on my front door and installed it the month it was launched in the spring of 2018. So I’ve had almost 9 months to assess the features of the Nest Hello and how I use it daily. Since I’ve had the doorbell installed I haven’t had a single Amazon package stolen from my front porch which is an accomplishment in itself, as any smart doorbell is a great deterrent for crime. On a daily basis I use the doorbell to check and see when deliveries have arrived and living in a multistory house it’s great to see what is going on at my front door when I’m busy in my office.
The Nest Hello requires that your existing doorbell be in working order and that you have a compatible transformer that outputs between 14-24V. However we recommend that your transformer have an output of at least 16V to ensure proper function. We have an entire guide on what transformers that work with nest hello and how to install them in another blog post. We also provide a list of compatible transformers for the nest hello in this post.
Related Post: Complete Smart Doorbell Guide Ring vs Nest Hello
Nest Hello Review: What is the Nest Hello Video Doorbell?

The Nest Hello smart doorbell is a smart doorbell camera that records and streams live video and serves the dual purpose of a doorbell. The Nest Hello is replacement for your existing hardwired doorbell to operate as a smart doorbell that will alert you on your cell phone when it detects motion, sound, people or when the doorbell is pressed.
You can be anywhere in the world and see a live view of exactly who is at your front door when they press your doorbell button in an instant. It also has 2 way communication with anyone at your front door as the Nest Hello has a built in microphone and speaker allowing you to talk through your phone just like a video chat.
Overall the Nest Hello is a capable doorbell that fits in with other smart devices in your home and works on the Nest App with other nest devices if you already have a Nest Smart Thermostat, Nest Camera, Nest Lock or other Nest Device installed. If you have an existing working doorbell it takes about 15-45 minutes to install and set up your new Nest Hello and a project most homeowners can complete, with the right tools. I would rate it as a medium difficulty project.

Nest Hello Review Comparison Chart
Nest Hello Review: Video Quality
The Nest Hello streams full HD video (1600 x 1200 Pixels) on its highest resolution setting in the nest app. I have found that the high resolution setting is clear enough to identify faces from 20-30 FT away or read a license plate on a car. Any further than 20-30 FT away and you can clearly see what is happening, what type of car a person is driving, their hair style, if they are a male or female and what clothes they are wearing but it’s outside of the range of a great face shot. I’ve found the 20-30 FT distance is more than adequate to protect your doorstep and front lawn from would be intruders.
However where the doorbell shines is close up shots of people's faces as they approach the door under 10 FT. It will clearly catch a great shot of anyone approaching the door, and even has facial recognition that can recognize familiar faces of friends, family members and even the mailman. The facial recognition feature is a great value as it is typically only available on the higher end Nest IQ cameras but also works on the Nest Hello Smart Doorbell.
Nest Hello Review: How It Works
Once you have your Nest Hello installed, you connect it to your wifi network through the Nest App and your smart doorbell is up and running. With the Nest Hello installed when someone presses the doorbell button on your Nest Hello, the chime inside your house will ring but you will also receive a notification on your phone that someone is at the front door. When you click on the notification the screen below will pop up and you can choose from one of the pre-recorded responses like “leave it at the front door” or click the microphone button to communicate with the person at your front door. The two way communication feature has been very useful for package deliveries when the driver is unsure if they are in the right location or if it is safe to leave a package. You can also click ignore if you want to dismiss the doorbell ring completely.
You will receive notifications on your phone if you are at home, work or anywhere else your phone has a wifi or data connection. If you get one of the Nest subscription plans with your Nest Hello Doorbell, the live footage will be stored in the cloud 24/7 for your review at anypoint in the future.

Nest Hello Review: Smart Phone Push Notification From Nest Hello On Phone.

Nest Hello Review: Answer your Nest Hello Doorbell From your Phone.
Nest Hello Review: Smart Features
The Nest Hello is packed with smart features, we’ve listed the smart features we’ve found people use the most or ask us about when they want to learn more about the Nest Hello.
Indoor Chime On/Off - Mute Feature: With this feature if you have the Nest Hello chime connector installed it will allow you to mute your doorbell chime if you had a child napping, or a dog that goes crazy when the doorbell is pushed. You will still get notifications on your phone but the chime is silenced.
Camera On/Off - This doesn’t get used that often, but maybe you're planning a surprise party or bringing in a gift for a family member, you can temporarily turn off your Nest Hello doorbell. Just remember to turn it back on when you are done.
Notifications - With the notifications feature you can choose when to receive notifications, you can choose to always receive notifications on your phone or only when no one is home. You can also choose to receive notifications not only when the doorbell is pushed but when your doorbell detects People, Motion, or Sounds.
Activity Zones - If you sign up for the nest subscription plan you can designate zones in Nest Hello’s field of view to provide you specific motion alerts when motion is detected. It’s great if you live on a busy street and want to be alerted only when motion is detected on your front porch. You can draw the specific zones you want to monitor in your front yard though the nest service.
Visitor Announcements - If you have a Google Home device like the Google Home Mini or Google Home you can connect wirelessly it to the Nest Hello and it will announce “someone is at the front door” and make a “chime” sound when your doorbell button is pressed on the Nest Hello. We teach you how to connect your Nest Hello to your Google Home Device in another post here.
Night Vision - The Nest Hello is equipped with night vision and built in infrared lighting that illuminates the area in front of the doorbell. The best setting for the night vision feature is auto which will automatically turn on the infrared illumination and high quality night vision when the nest detects low light levels and will optimize the video quality for night viewing.
Quality and Bandwidth - The quality and bandwidth feature allows you to adjust the resolution and bandwidth your smart doorbell uses. If you have a fast internet connection with a lot of bandwidth setting your smart doorbell to HD - High Quality is the best option. If you have a lot of streaming devices in your household and a slower internet connection the bandwidth setting allows you to throttle back the data usage freeing up bandwidth for other devices in your home.
Chime Duration - This feature is only applicable if you have an electronic chime like this Hampton Bay electronic chime. The chime duration feature allows you shorten or extend how long the electronic chime plays when the doorbell is pushed. Some electronic chimes play melodies so choosing the right duration makes sure the chime doesn’t cut off in the middle of an awkward tone. We have installed an tested Hampton Bay Electronic chimes and confirmed they work with the the Nest Hello, it is important that they are installed with a compatible 16V transformer. Electronic chimes don’t work well with transformers that output more than 16V. You can also easily change the cover for your electronic or standard chime if you want to change the design, 95% of all standard doorbell covers are interchangeable.
Nest Hello Review: Why Smart Doorbells are better than Smart Cameras
Smart cameras are great and will catch lots of great footage around your home but they have one fundamental flaw: Height
Most people think that the higher you place a camera the better off you are, they think you’ll get a larger viewing angle, cover more area, have less obstructions like bushes and keep the camera out of harm's way from vandalism. And those people are right, all those things are true.
However if you are in a situation that you actually want to identify a specific person such as when an Amazon package gets stolen from your front door you need a face shot to give the authorities. Guess what most people catch on their smart cameras, when a package is stolen? Hats, yes that’s right a $5 hat can defeat your smart camera if you mount it too high. If you mount your smart camera too high a person doesn’t even need a hat to conceal their face because the angle is too steep to get a clear shot of a person’s face.
This is where the Nest Hello Doorbell outperforms smart cameras. The Nest Hello gets clear, identifiable shots of anyone approaching your front door. The Nest Hello is great for both detering package theft and getting a clear face shot of whomever decided to take your package.
But more than even a deterrent for package theft the Nest Hello can notify you when a package has arrived so you can bring it inside and you don't unnecessarily let it sit longer on your porch to tempt would be package thieves.
If you aren’t convinced a smart doorbell is right for you or you don’t have the existing wiring for the Nest Hello Doorbell and choose to get a smart camera instead of a smart doorbell we recommend that you don’t mount your smart camera any higher than 9 FT. Mounting the camera 9FT or lower will give you clear shots of people's faces and still keep the camera out of reach of the majority of vandal attacks.
With smart cameras and doorbells we’ve found that vandalism occurrences are very low to almost nonexistent. In the hundreds of cameras we’ve helped people install and the tens of thousands of smart home enthusiasts we interact with monthly we’ve never seen or heard of a nest cam being smashed, vandalized or stolen. So you shouldn’t mount your camera too high because your afraid of someone stealing it or vandalizing it because it just doesn’t happen that often.
If you have a had a nest camera stolen or vandalized please comment or email us because we’d love to share your story. Send us a picture and the footage maybe we’ll even catch the suspect. But if the comments are empty below its because people’s cameras aren’t being stolen.
In the thousands of interactions we’ve had with smart home enthusiasts the only vandalism case we’ve ever heard of was one caused by mother nature herself which directly struck a house and nest camera zapping it to a crisp.
A smart doorbell doesn’t have this issue of being too high. A smart doorbell like the Nest Hello mounted between 42”- 56” inches is the perfect height to get the faces of anyone at your front door.

Nest Hello Review & Installation: View of Nest Hello From Nest App Home Screen
Nest Hello Review: Nest Hello Recording Plans
The lowest cost nest recording plan which seems to be suitable for most nest user's is the 5 day 24/7 recording plan. The nest will store 5 days of continuously recorded footage for you to review either on your phone or any computer with an internet connection. The nest app makes it easy to share and save videos for later use by just clicking the share button within the app and you can send the clip to any email address. The cost of the 5 day 24/7 nest hello recording plan is $5 per month.
The Nest Hello’s 24/7 continuous recording is always streaming video to the cloud 24/7. This means you have a continuous recording of everything, like the clouds slowly drifting over you home. But this also means that your Nest Hello Doorbell is sending lots and lots of data to the cloud, which on the highest resolution can be more than 300GB per month. If you are at a 1,000GB cap you might want to either lower your resolution setting or add more data usage to your internet plan. If you have several nest cameras in addition to the Nest Hello Doorbell your going to want to make sure that you have a robust wifi system like Eero or Google Mesh and a speedy internet provider connection.
Related Post: What is the best wifi system for Nest?
I have xfinity internet and have yet to meet the data cap with my Nest Hello Smart Doorbell and several other cameras and enjoy the 24/7 footage that I can scroll through almost like a timelapse of the day.
If you have more than one nest camera like the nest outdoor or nest indoor camera you can get a discount on the monthly recording plan for each camera. The cost for 5 days of recording for each additional camera is $3 per month.
Nest Hello Installation

Nest Hello Review: Installation Step by Step.
We’re going to cover both how to install your nest doorbell but also several tips for installation based on our installation experience, and hundreds of nest pro installer reports and experiences.
Nest Hello Installation step by step:
Here were going to give you the best instructions to set up the Nest Hello, based on our experience. We don't follow the Nest Hello in app instructions exactly because sometimes they can seem overwhelming and time consuming for many people or discourage you from installing the Nest Hello. We’ve condensed the instructions to the most important parts so you can get an idea of what you will need to do to install your nest hello.
1.Download the nest app and create an account if you haven’t already.
2. Turn off power to your existing doorbell. Typically the doorbell power and transformer is located near your HVAC equipment, in your garage or basement 95% that is where we have found doorbell transformers. If you are unsure which circuit your doorbell is on you can keep turning them off till your doorbell no longer works. You will know the doorbell is no longer working when you press it and it doesn’t ring any longer.
Related Post: What Transformer Should I Use For Nest? Is My Transformer Compatible?
3. If you can’t find the right circuit breaker to turn off the power to your Nest Hello you can open the chime box for your doorbell and just disconnect both wires on the screw terminals this will kill the power at the doorbell. Mark the wires or take a picture so you know which wire was on which terminal.
4. Remove the existing doorbell and doorbell chime cover. If you have not already take a picture of the terminal wiring on your chime box and mark the wires in someway so you know what wire was connected where on your chime box. Now unscrew each wire from the terminals on your doorbell chime box.
5. Install the Nest Hello doorbell on where your old doorbell was located. If you want to change the viewing angle for the Nest Hello there is a 15 degree wedge that allows you to tilt the Nest Hello to one direction or the other. If you need more than 15 degrees of adjustment and want to tilt your doorbell one way or the other you can get a 3rd party tilt mount on Amazon.com that allows for 35 degrees of adjustment. If you are installing your Nest Hello on a standard wood or metal frame you can use the provided screws and just screw the doorbell mounting plate directly on to the frame. You should start by lining up the plate where you want it and so the doorbell wires will make it through the center hole of the doorbell mounting plate, pull them through before you mount the plate.
You should also note that the Nest Hello doorbell doesn’t allow clearance behind the doorbell to route the wires so you want to either be able to push some of the wiring back into the hole where the wiring came from or have just enough wiring to make the screw connections on the back of the doorbell. If you don’t think your going to have enough space for the wires behind the doorbell, adding the nest hello doorbell wedge will give you more clearance.
Start by screwing in the top screw to the doorbell mounting plate first. If your using the wedge you will need to peel off the stickers on the wedge adhesive and stick it to the mounting plate before mounting.
Once you have installed the top screw make sure you have the doorbell level and make any adjustments. Screw in the bottom hole of the mounting plate, the bottom screw hole is slightly larger and allows for slight level adjustments of the doorbell.
If you are installing the Nest Hello on brick, concrete limestone or masonry you will need to pre drill the screw holes. The Nest Hello comes with a masonry drill bit that you use to pre drill the holes with. The masonry bit will work with any standard drill but we recommend using a hammer drill as it will go much quicker. You should try and mount the back plate so you are drilling both the top and bottom holes into the grout lines as it will be much easier to drill. If this is not possible try and drill at least the top hole into the grout line. If you get a good secure mount with only the top screw in masonry you don’t necessarily need the bottom screw if you are having a hard time drilling into brick. Once you’ve drilled the hole insert the plastic anchors into the hole put the plate up and now screw in the provided screw, go slowly with the screw to expand the anchor, you don’t want to strip the anchor with the screw by going to fast.
I personally use a milwaukee hammer drill for drilling into masonry. I use milwaukee cordless drills and milwaukee cordless tools because for me they have been proven reliable, long lasting and I can use my batteries across all of their tools. They are an investment but they last and work well so to me that makes them a great value, when I was a general contractor it seemed like the majority of tradesmen used Milwaukee tools….ok back to doorbells Milwaukee didn’t pay me for that, I just think they are great cordless tools and some of you appreciate having great, reliable tools.
6. To Install the the doorbell, slightly unscrew each screw on the back of the Nest Hello Doorbell. Don’t unscrew these to much as they can fall out of the doorbell and get lost which will require you to get a new screw for the back of the doorbell.
7. Take your two doorbell wires and attach them to the screw terminals on the back of the nest hello.
8. Push the Nest Hello on too the mounting plate. The Nest Hello should be angled upwards to catch the top lip of the doorbell mounting notch then rotate and push the bottom of the doorbell in until the doorbell “snaps” securely in place. If the Nest Hello doorbell won’t snap into place then try pushing more of the wiring back into the hole in the wall where it came from, folding the wiring behind the doorbell so it is flatter, add the nest wedge plate to give you more clearance or shorten the amount of wire behind the doorbell.
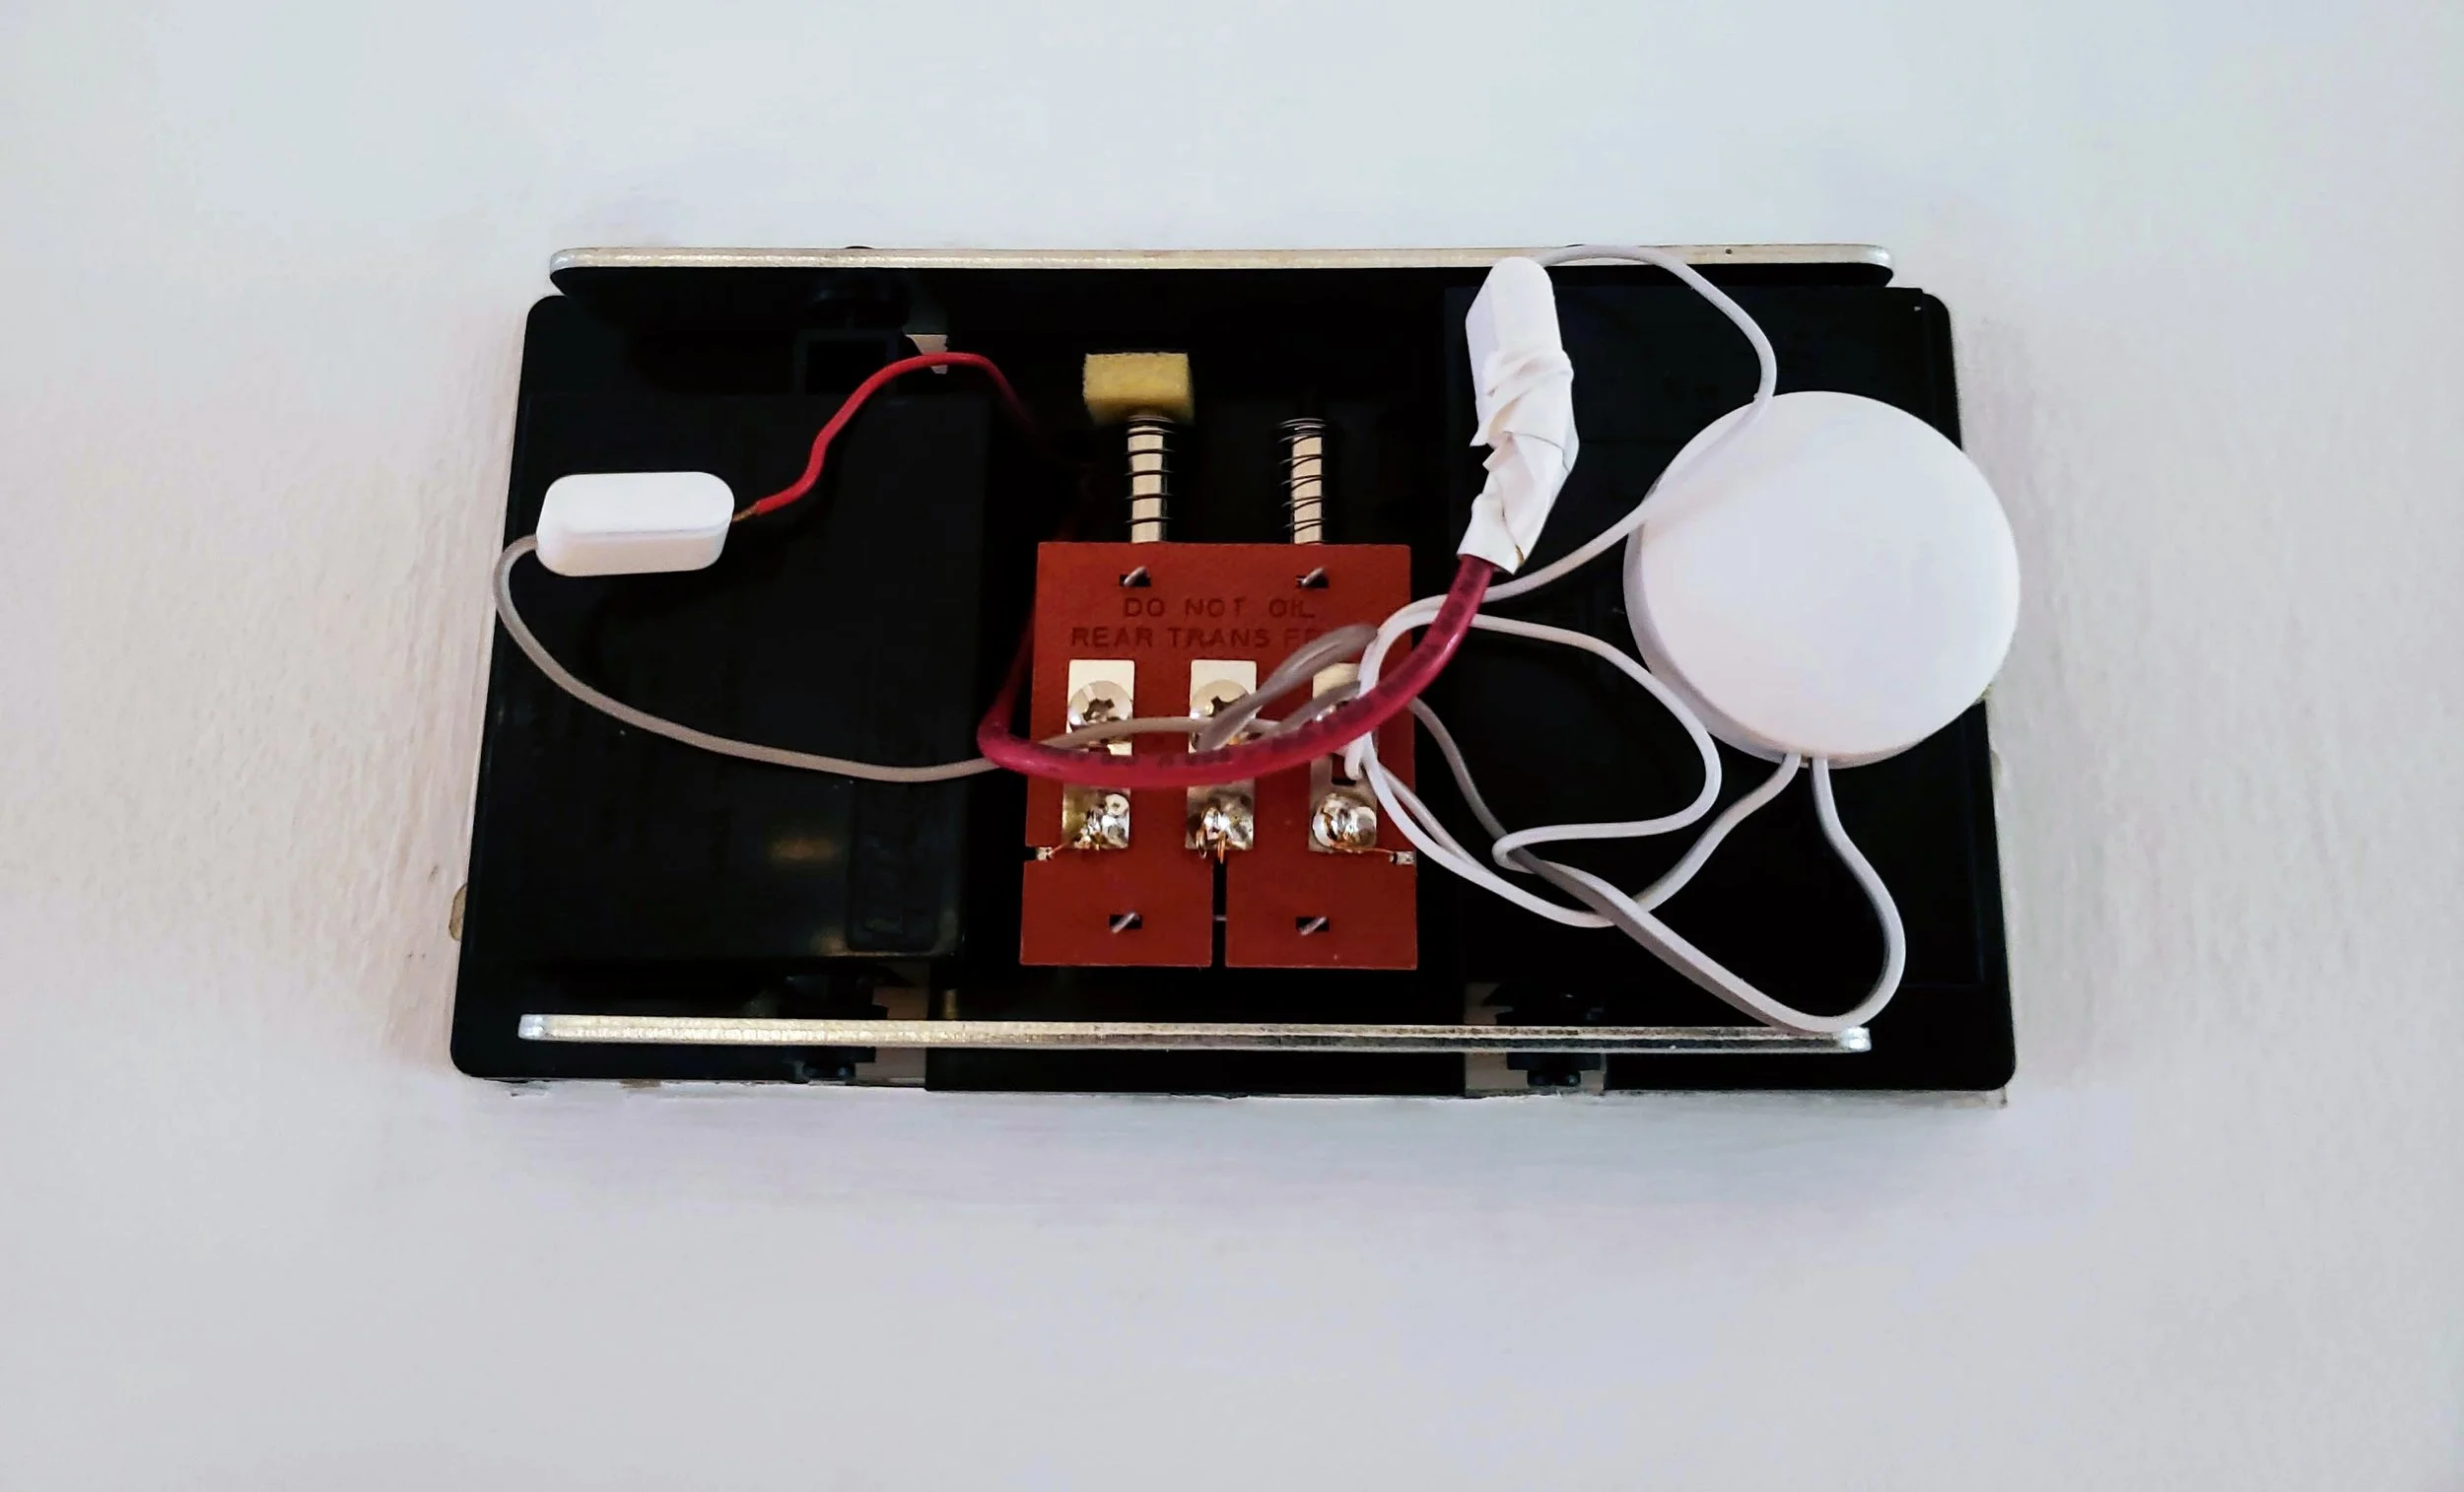
9. Install the Nest Hello doorbell chime connector on your existing chime. The grey wire on the nest hello chime connector (the round thing with the two wires sticking out) should be wired to the middle or “transformer” terminal on the doorbell chime. The white wire on the nest hello chime connector should be connected to the terminal labeled “front”. With the Nest Hello chime connector wired to the doorbell terminals you can now insert the wires from the doorbell into the ends of the chime connectors. The wire originally from the “transformer terminal” should be placed in the grey wire connector. The wire originally from the “front terminal” should be placed in the white wire connector.
10. If you turned off the power, you can now turn your the power back on. Your Nest Hello doorbell should have blue ring around the bottom button as in the picture below. If there is no light at all, it means your Nest Doorbell is getting no power. If the light is yellow it means your Nest Hello Doorbell is not getting enough power and you need to replace your transformer with one with a higher voltage. Read the posts below for the two options on replacing your doorbell transformer with higher voltage.
Option 1: How to replace your doorbell transformer with a higher voltage hardwired transformer
Option 2: How to replace your doorbell transformer with higher voltage plug in transformer.
11. If the light around the doorbell button is blue on your Nest Hello, you are ready to set up the Nest Hello Doorbell on the Nest App. Make sure your have bluetooth enabled on your phone and you are connected to the wifi network you want to connect your Nest Hello too. Open the Nest App and click add a product, the QR code you can scan for the Nest Hello is located on the back of the paper instruction insert in the Nest Hello box. You can click through the instructions since you have already done all the hard work.
12. Congratulations your Nest Hello should now be installed and working with your cell phone.
Nest Hello Review: Summary
Note: KEEP READING FOR TIPS, TRICKS AND FAQ BELOW
The Nest Hello is one of the most capable doorbells on the market. I have the Nest Hello installed on my home and love that it works on the Nest App with my other Nest devices. I have been impressed with the picture quality of the Nest Hello when set on HD High Quality footage. I think the best thing about having a smart doorbell is that it’s a great deterrent to criminals. They can see plainly they are being recorded, and that gives me peace of mind and I think has a real impact on some people who would otherwise commit crimes of opportunity. If you already have other nest products the Nest Hello is a great addition to your other nest smart home products.
The only real drawback of the Nest Hello is the $5 a month video recording fee that we covered above. Other than that the Nest Hello is a reliable, capable smart doorbell that will protect your front door and home with its HD video footage.
Related Post: Smart Doorbell Guide & Comparison
Nest Hello Installation Review: Tips, Tricks & Things You Should Know Before Installing

Nest Hello Installed With Larger 3rd Party Back Plate. You can also adjust the angle of your Nest Hello up to 35 Degrees with this Back Plate.
Doorbell Chimes & Nest Hello
The Nest doorbell works with both mechanical and electronic chimes. However we have found that we have the fewest issues with mechanical chimes like these from Heath Zenith. If you can't get your nest doorbell to work with your electronic chime you can always replace it with simple mechanical chime like from heath zenith. If you have power to your Nest Hello doorbell and it’s connected to the app and the chime won’t ring it’s possible that there is a very simple solution to your problem.
Before you replace your chime you should do the following things to make sure the app settings are correct for your Nest Hello doorbell chime. Once you have the Nest Hello set up you will need to go into the settings menu for the Nest Hello smart doorbell and check that your doorbell chime is selection is properly marked as either (mechanical chime or electronic chime). A mechanical chime will have two small pistons in it and look like this, and an electronic chime typically is a fully enclosed plastic case and sometimes had a battery compartment but will look like this on the inside.
Full List Of Doorbell Chimes That Work With Nest Hello
Nest Hello Review: Mechanical Chime - We have found that mechanical chimes work the best with the Nest Hello. We recommend this mechanical chime from Heath Zenith. It has a modern no distracting cover and we have tested it to know it works with the Nest Hello.
Once you have confirmed you have the right chime selection mechanical or electronic go press your doorbell to see if it will chime. The Nest doorbell should have a blue light around the bottom button to confirm that it is properly working. If it’s not blue it means your Nest doorbell is not getting enough power, or any power at all. Assuming that your Nest doorbell is properly lit with the blue light and you pushed the button and it still did not work you will need to make sure that you have the chime notifications allowed and on in the settings menu in the Nest Hello. You should also re-check your connections at your doorbell chime and make sure that the wires are fully inserted into the chime connectors and that the chime connector is wired to the doorbell chime.
Adjusting the Nest Hello Viewing Angle
You can adjust the Nest Hello viewing angle side to side but not up or down. The Nest Hello comes with a 15 degree wedge that allows you to adjust the viewing angle. You can also get a wedge that allows more adjustment side to side from amazon with 35 degrees of adjustment.
Related Post: How To Get The Best View With Your Nest Hello
How to Check your Transformer Voltage
You can check your transformer voltage three ways. With a multimeter, by visually inspecting it or by installing the Nest Hello and seeing if it works. With the multimeter you can unscrew the old doorbell, but leave the wiring on the terminals in place and put your multimeter on each terminal and measure the voltage. Make sure the power is on and you have the multimeter set to AC voltage. The multimeter should read between 14-24V to be compatible with Nest Hello. You can visually inspect the transformer like in the picture below if it is at least 16V and over 10VA it should be compatible with the Nest Hello. However we recommend transformers that are at least 20VA or more for the most reliable function, but if you have a 10VA transformer already you should attempt installing the Nest Hello because it will most likely work. You can also check the voltage by installing the Nest Hello. If the light around the doorbell button is blue, all good you have enough power. If it’s yellow you need to upgrade your transformer.

Related post: What transformer should I use for Nest Hello?
Nest Hello Review: FAQ
Does Nest Hello work with Alexa?
Yes, the Nest Hello works with Alexa. You can view the live video feed from your Nest Hello on your Amazon Echo Show or Echo Spot. We teach you how to connect your Nest Hello to Alexa in another post.
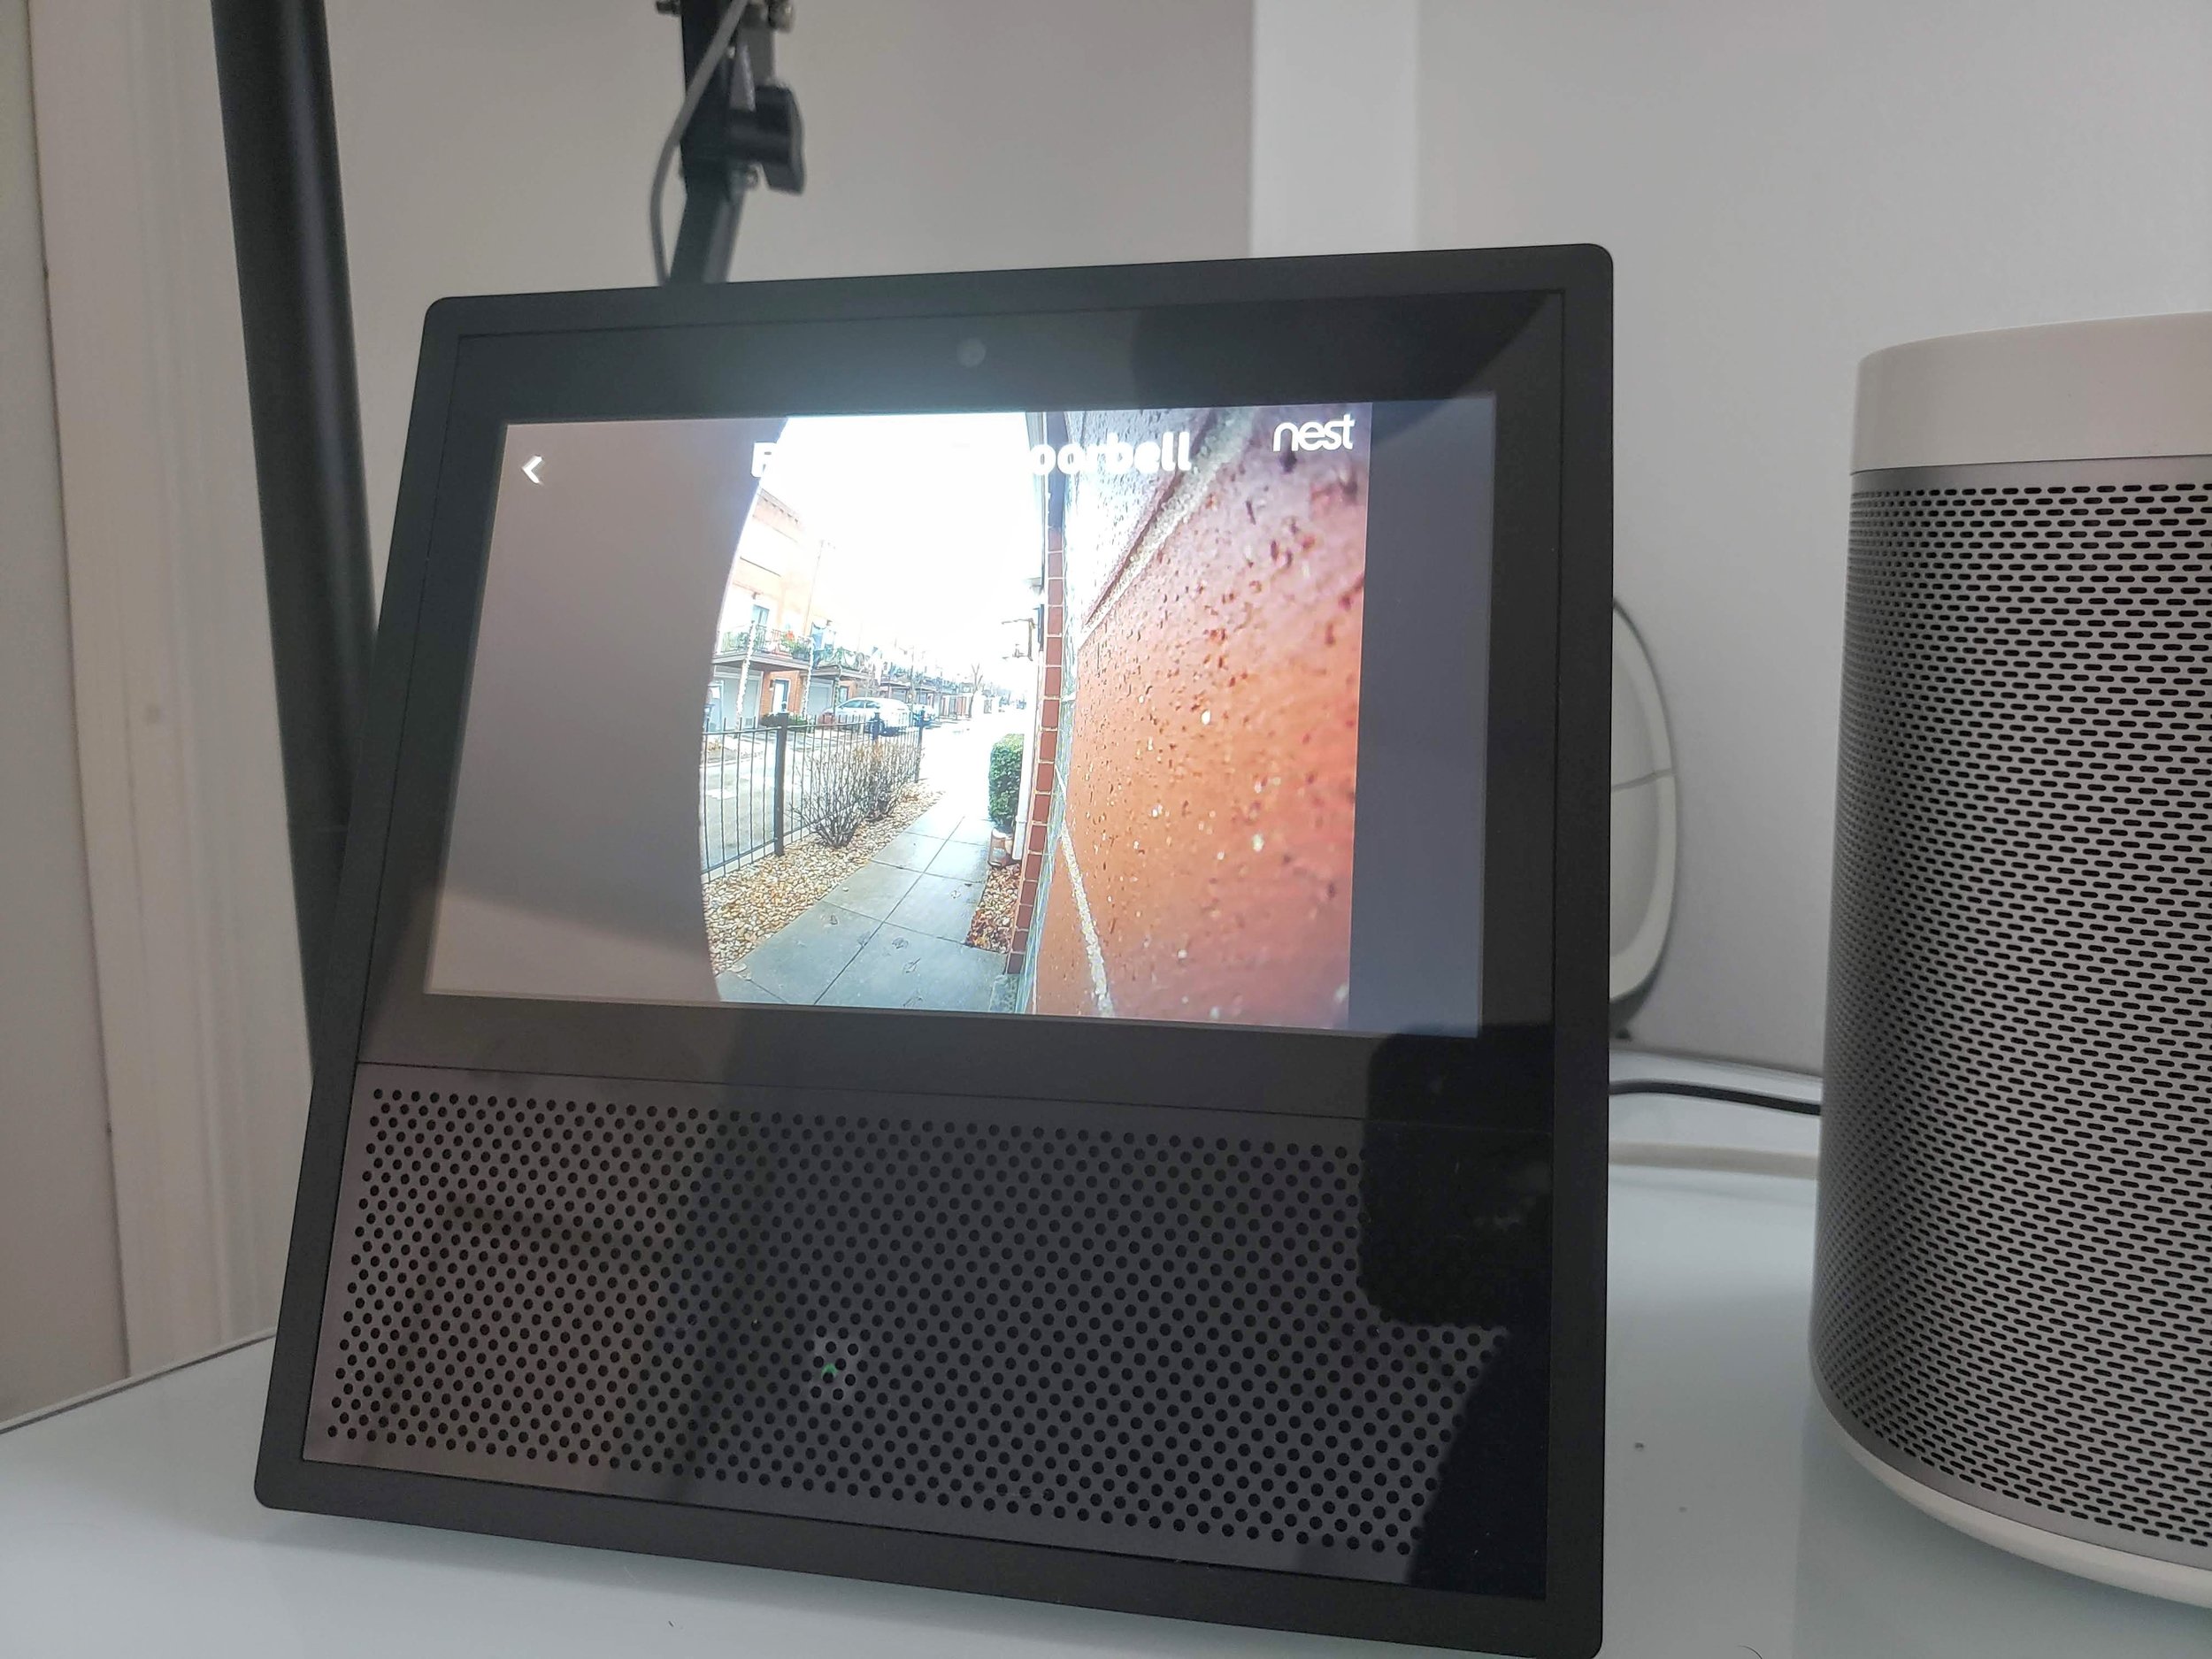
Nest Hello Review: Nest Hello Live Video feed on Echo Show.
Does Nest Hello Work with Google Home?
Yes, Nest Hello works with Google Home, Google Home Mini and Google Home Hub. The Google Home & Google Home Mini can be used as remote doorbell chimes while the Google Home Hub can be used to display the live video feed from your Nest Hello. We teach you how to connect your Nest Hello to Google Home in another post.

Does Nest Hello Have a Battery?
No, the Nest Hello is hardwired and requires a constant wired power source from a doorbell transformer. We cover what transformers to use for your Nest Hello in another post if your existing transformer does not have enough power. The Ring Doorbell and Ring Doorbell 2 don’t require a hardwired connection and use rechargeable batteries. You can learn more about other smart doorbells in our smart doorbell guide.
Does Nest Hello Require a Subscription?
It does not require a subscription if you want to view your live video feed from your front door or use it as a smart doorbell to alert you when someone is at the front door.
However the Nest Hello does require a subscription if you want to be able to record or save any footage from the Nest Hello. The Nest video subscription plan is $5/month and includes 24/7 recording of your doorbell with 5 days of continuous saved footage that you can review, save or send on your cell phone or tablet.
Does Nest Hello Work in Cold Weather?
Yes, the Nest Hello specifications state that it will work from 5 Degrees Fahrenheit to 104 Degrees Fahrenheit. However we have not received a single report of a Nest Hello failing due to hot or cold weather. Please comment on the post and tell us your story if this has happened to you.

Nest Hello Review: Nest Hello Operating Temperature Range
Does Nest Hello Work With A Wireless Chime?
Yes and No. The Nest Hello will not work with a traditional wireless chime box for your existing doorbell, and the Nest Hello is required to be hardwired with a constant source of power from 14-24V AC. But the Nest Hello Does work with the Google Home & Google Home Mini devices as remote wire free chimes. By adjusting the setting in your nest app and connecting your Google Home to your Nest Hello you can use your Google Home device as a remote chime. We teach you how to connect your Google Home as a chime to Nest Hello in another post here.
Does the Nest Hello Need A Chime?
No, the Nest Hello does not need a chime to work. If you have an existing hardwired chime for your doorbell the Nest Hello will most likely work with it and will ring like a normal doorbell when pressed. If you don’t have a doorbell chime the Nest Hello will still provide you notifications on your phone but there will be no doorbell chime inside your house. If you don’t have a chime and you don’t want to go through the trouble of installing a chime you can install a Google Home Mini and it will work as a remote doorbell chime anywhere you place it in your home. We teach you how to use your Google Home Mini as a chime with your nest hello in another post here.
Related Post: What Doorbell Chimes Work With Nest Hello
Related Posts:
Does Nest Hello Work With Alexa?